Enabling permissions for EDR in 10 steps
1. Open the System Preferences application on your Mac. You can find it in the Applications folder or by clicking on the Apple icon in the top-left corner of your screen and selecting "System Preferences" from the drop-down menu.

2. Click on the "Privacy & Security" icon.
3. Scroll down and select "Full Disk Access" from the list of options on the left-hand side of the window.

4. Click on the padlock icon in the bottom-left corner of the window and enter your administrator username and password to unlock the settings.
5. Click on the "+" button in the bottom-left corner of the window to add a new application to the list.
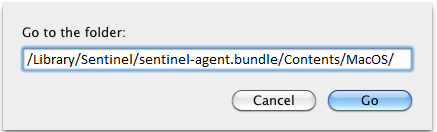
6. Navigate to the location where the "sentineld_shell" file is located by using the following method - Hit Command+Shift+G from the Mac OS X desktop or a Finder window and paste the path in:
/Library/Sentinel/sentinel-agent.bundle/Contents/MacOS/
7. Select the "sentineld_shell" file and click "Open" to add it to the Full Disk Access list..
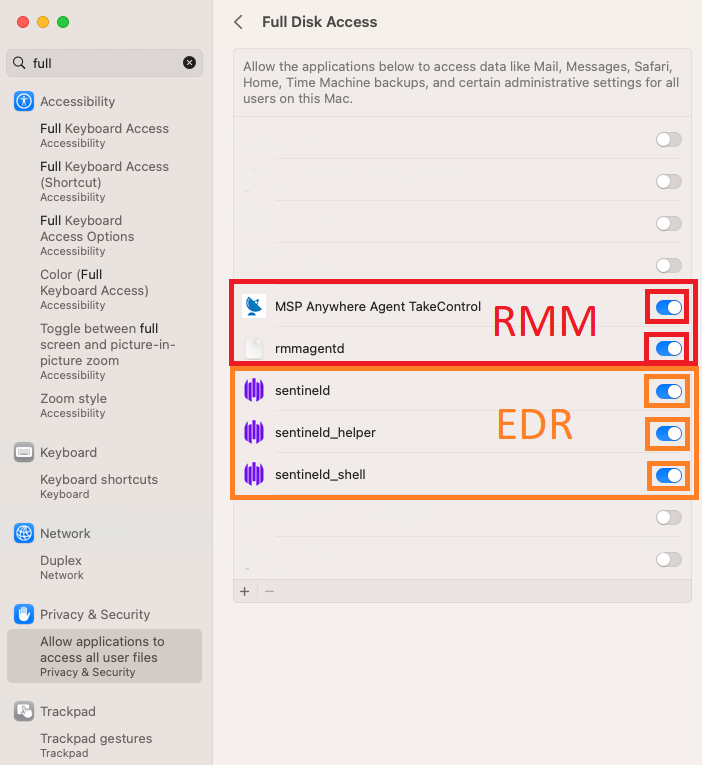
8. Close the System Preferences window, and the Full Disk Access permissions should now be enabled for SentinelOne EDR.
That's it! By following these steps, you should be able to enable Full Disk Access permissions for SentinelOne EDR on your Mac device.
This is the expected result:
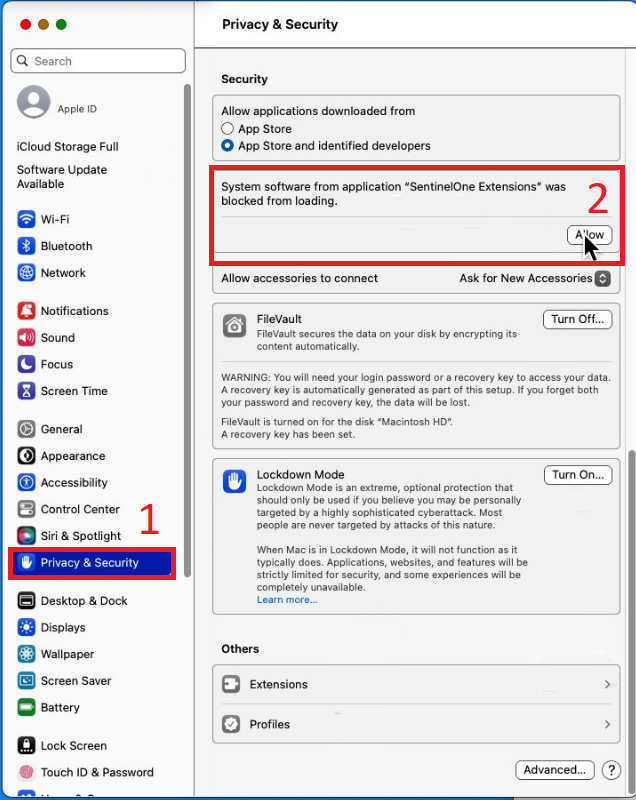
To approve the Network Extension:
Change Extensions settings on Mac
On your Mac, use Extensions settings to enable and disable Apple and third-party extensions for your Mac, and select extensions to include in the Share menu. Extensions, such as Markup, add extra functionality to apps, the Finder, and the Touch Bar.
To change these settings:
Choose Apple menu ![]() > System Settings, click Privacy & Security
> System Settings, click Privacy & Security ![]() in the sidebar,
in the sidebar,
then click Extensions ![]() on the right. (You may need to scroll down.)
on the right. (You may need to scroll down.)
If you find trouble, contact support@tekrisq.com for assistance.